Community /
Blogs
The opinions expressed in these blogs are solely those of the people who wrote them, and do not represent the views of WPSU or Penn State University.
Local Food Journey
Saving Seeds from Tomatoes
Posted by Jamie Oberdick on 09/09 at 12:11 PM

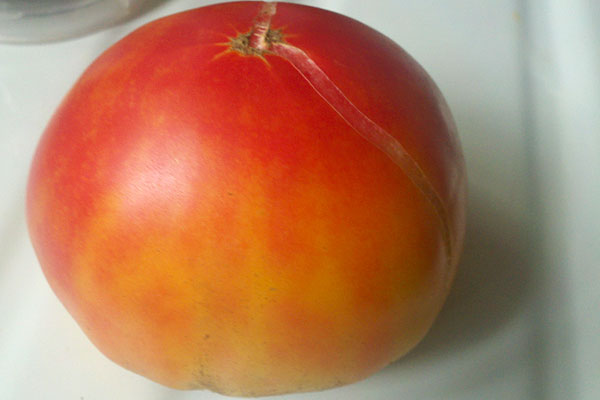
The pineapple tomato has a beautiful yellow with red marbling color throughout, and a sweet delicious flavor. Photo Credit Jamie Oberdick.
Okay, you got some fantastic heirloom tomatoes, among the best you’ve ever had. You may have bought them at a farmers market or received them in a CSA box, or perhaps they were gifted to you by a friend. But you’re not sure of the variety so you can’t buy the seeds, right? No worries—saving tomato seeds is actually quite simple.
First, take one of those awesome tomatoes and cut it in half across its middle. Then either use your fingers or a spoon to remove both the seeds and the gooey stuff, and place them in a clean cup—a plastic cup is fine. Then add 2-3 tablespoons of water, and cover the cup with plastic. Make sure you slit the top of the plastic—air flow is vital here.
The reason you need air flow is because you want to encourage fermentation. Why are you fermenting the seeds? Because the process kills any disease that may be in the seeds.
Once you have done this, put the cup in a warm location like a sunny windowsill, out of the reach of curious kids or cats. Every day you want to stir this nasty little soup. You will notice a film forming on top, and that’s great. This is the fermentation process taking hold.
After 2-3 days, remove the film on top and pour the contents into a small strainer. Warning: the smell is, well….quite awful, so don’t inhale too much. Give them a good rinse, tapping the strainer to shake off access water.
Get a plate and put a coffee filter on it. Dump the seeds onto the coffee filter, spreading them out to get them as close to a single layer as you can. Then put them in a place where they can safely dry. Drying time can take a week, or more than a week in rainy weather. Once a day, stir the seeds around to ensure complete drying. They are dry when they no longer stick together when you touch them.
Next, find something to put them in, such as a small envelope. You can buy little envelopes at an office supply store that are perfect for this purpose.
That’s it! Now you have seeds for next year. One final tip: filling a little envelope with a handful of tomato seeds makes a nice holiday gift for your favorite gardener.
![]() Author: Jamie Oberdick
Author: Jamie Oberdick
Bio: Editor, Local Food Journey | Passionate about supporting local food in Central PA
Leave a Comment
Commenting is not available in this section entry. « Penn State vs Alabama Preview Asian-Style Ratatouille with Eggplant »Most recent entries
 Our Local Food Journey comes to an end
- Wednesday, January 31, 2018
- By Jamie Oberdick in Local Food Journey
 Winter isn’t a quiet time at the farm
- Wednesday, January 31, 2018
- By James Eisenstein in Local Food Journey
 Get the taste of garden season right now by growing herbs indoors
- Friday, January 26, 2018
- By Jamie Oberdick in Local Food Journey
 All you need to know about PASA’s Farming for the Future conference
- Friday, January 19, 2018
- By Jamie Oberdick in Local Food Journey
Categories
Archives
- January 2018
- December 2017
- November 2017
- October 2017
- September 2017
- August 2017
- July 2017
- June 2017
- May 2017
- April 2017
- March 2017
- February 2017
- January 2017
- December 2016
- November 2016
- October 2016
- September 2016
- August 2016
- July 2016
- June 2016
- May 2016
- April 2016
- March 2016
- February 2016
- January 2016
- December 2015
- November 2015
- October 2015
- September 2015
- August 2015
- July 2015
- June 2015
- May 2015
- April 2015
- March 2015
- February 2015
- January 2015
- December 2014
- November 2014
- October 2014
- September 2014
- August 2014
- July 2014
- June 2014
- May 2014
- April 2014
- March 2014
- February 2014
- January 2014
- December 2013
- November 2013
- October 2013
- September 2013
- August 2013
- July 2013
- June 2013
- May 2013
- April 2013
- March 2013
- February 2013
- January 2013
- December 2012
- November 2012
- October 2012
- September 2012
- August 2012
- July 2012
- June 2012
- May 2012
- April 2012
- March 2012
- February 2012
- January 2012
- December 2011
- November 2011
- October 2011
- September 2011
- August 2011
- July 2011
- June 2011
- May 2011
- April 2011
- March 2011
- February 2011
- January 2011
- December 2010
- November 2010
- October 2010
- September 2010
- August 2010
- July 2010
- June 2010
- May 2010
- April 2010
- March 2010
- February 2010
- January 2010
- December 2009
- November 2009
- October 2009
- September 2009
- August 2009
- July 2009
- June 2009
- May 2009
- April 2009
- March 2009
- February 2009

Comments
Posted by .(JavaScript must be enabled to view this email address)
09/12 at 02:07 PM
Great post, Jamie! I had no idea…
Page 1 of 1 pages