

-

Erin Donahue -

Christina Barkanic -

Brittany Trott -

Emily Wiley -

Jessica Reilley -

Chris Raines -

Will Nichols -

Emily Reddy -

Michele Marchetti -

Michele Frank -

James Gherardi -

Kit Henshaw -

Christina and Erin -

Kim Tait -

Erin McKinney -

Steve Spanelli -

Sam Komlenic -

Katherine Taylor Grofic -

James Eisenstein -

Jamie Oberdick -

Anna Lombardo -

LacCreta Holland -

Tony Ricci -

Local Food Journey -

Laura Young -

Kristin Camplese -

Harrison's Fresh + Local -

Danielle Matalonis -

Kristine A. -

Linda Weaver -

Naomi Elle Schwartz -

Dana Stuchul -

Cara McShane -

Brittany Smith -

Jessica Illuzzi - Frosty
-

Jessica Paholsky -

James Sechrengost -

Brad Yeckley -

Maya Althouse -

Jordan Reabold -

Kim Chase -

Maria Bryant - Alexandrea Scott
recipes from the last Learning Kitchen plus details about tomorrow’s event
Posted by Cara McShane on 07/09, 2012 at 02:00 PM
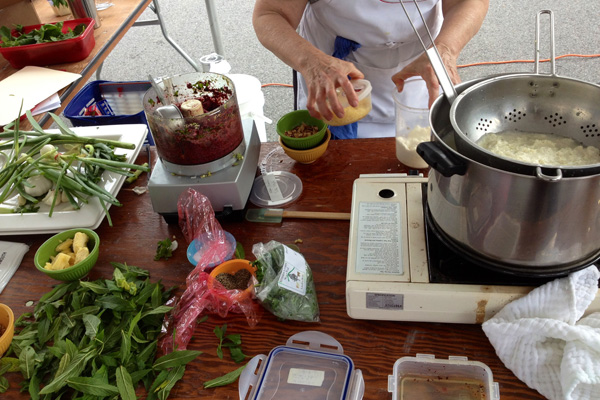
The Boalsburg Farmers Market will host its second Learning Kitchen event tomorrow, July 10th, from 2-4pm at the Pennsylvania Military Museum.
Join Sc’eric, Master Cocktailian from Fuji Jade Garden Restaurant, for “Cocktails from the Garden,” and Paul Kendeffy, Executive Chef at Zola’s New World Bistro and The Gamble Mill Restaurant, for “Farm to Fork: Fast and Flavorful.” Find out how to use market fresh ingredients to make cocktails and sangria and learn how to incorporate less common vegetables into everyday meals.
If you missed the first Learning Kitchen event, continue reading for recipes from Mark Johnson and Grace Pilato.
Sweet Quick Pickling Liquid Recipe
Mark Johnson, Elk Creek Cafe
4 cups vinegar (apple cider, rice wine, red wine, etc.)
8 cups water
2 cups sugar
4 tablespoons seas salt
5-10 smashed and peeled garlic cloves
4 dill sprigs
Plus a combination of spices, in moderation: peppercorn, dried chilies, mustard seeds, fennel seeds, caraway, cumin seeds, star anise.
Examples of vegetables to pickle: carrots, cucumbers, scallions, spring onions, shitakes, corn on the cob, garlic scapes, green beans, baby turnips, radishes, melon rinds (beneath the outer skin), ramps, rutabagas, daikon – basically anything you can get at your local farmers’ market
Combine all ingredients and heat until the sugar and salt have dissolved.
Either pour the hot pickling liquid directly over the cleaned items to be pickled, or prepare an ice bath and a pot of boiling water. Blanch your vegetables for a minute or two in the boiling water, drain and plunge in the ice bath to cease the cooking. After cooling the blanched vegetables, arrange in an appropriate container and pour the pickling liquid entirely over, or after cleaning your vegetables, simply pour the chilled pickling liquid over the raw vegetables. The end product will be crunchier pickled vegetables.
With either of the steps, allow the pickled vegetables at least five days before you dig in. If kept under refrigeration the pickles can last for up to two months.
A great secondary use is to utilize the pickling liquid as the acid component in a vinaigrette.
Brining Recipe
Mark Johnson, Elk Creek Cafe
2 quarts water
1 cup brown sugar
1 ¼ cup salt
4 bay leaves
½ tablespoon mustard seed
½ tablespoon black peppercorn
½ teaspoon chili flake
Heat all ingredients to dissolve the sugar and salt. Chill the brine completely before adding to meat.
Examples of meats & brining times:
Pork chops: overnight (no more than 12 hours)
Pork loin: overnight (no more than 12 hours)
Chicken on the bone: overnight (no more than 12 hours)
Pork belly (aka raw bacon): 12-24 hours
Brisket for “corned beef”: 9-21 days
Tips:
1. Make sure to rinse and pat dry pork chops, pork belly and chicken after taking out of brine and prior to cooking as the sugars in the brine can blacken the meats before they’re done.
2. If making corned beef, use about 1/6 of the brine and the rest water or stock to submerge the brisket fully. Simmer gently for 2-6 hours until fork tender. If you allow the brisket to cool in its cooking liquid it becomes easy to slice for sandwiches.
Goat’s Milk Fresh Ricotta
Grace Pilato
Yield: a little over 4 cups (2 lbs)
1 gallon goat’s milk
1 quart low-fat cultured buttermilk
¼ teaspoon salt (optional)
Rinse a heavy-bottomed 8-quart stainless steel pot under cold water and drain out excess water. Do not dry the pot. Pour goat’s milk and buttermilk into pot and add salt if using. Place pot over medium heat and stir gently but thoroughly using a stainless steel or heat-resistant rubber spatula, making sure to get the entire surface of the bottom of the pot. Set your timer to ring every five minutes; the ringing will remind you to stir, preventing your milk from scorching. Check the temperature of your milk mixture every time you stir, giving you a heads up on the activity of the milk. It will take about 30 minutes for the milk to reach 170°F. If you want to keep the curds larger, try not to stir too often and always stir gently.
When the mixture reaches 170°F stop stirring, you will start to see curds forming. A minute or so later, the liquid will go from the milky white color to almost clear. The whey is now separating from the curds. Keep checking the temperature of the mixture every minute. When the temperature reaches 200-205°F, the curds should be formed on the top of your pot, nice and white in color and very fluffy, while the whey is underneath the curds, almost clear in color with a light green tinge. Remove pot from burner and place clean tea towel over pot. Leave pot undisturbed for 30 minutes.
While ricotta is resting and firming up, dampen the cheesecloth and wring out excess water. Place cheesecloth inside colander or sieve and place the lined colander over a pot or bowl, making sure that the bottom of the colander is not touching the bottom of the pan or bowl so that the whey has room to drain freely from the ricotta. The length of time you drain your ricotta depends on how dry you want your ricotta to be and what recipe the ricotta will be used in. Please try not to make the mistake of draining your ricotta too long – the ricotta will stiffen and become drier as it chills. Usually 30 minutes is ample. As you are learning this cheese making process, save ¼ cup of the whey, just in case you have drained the ricotta too long, stir some of the whey back into your ricotta.
Place drained ricotta in lidded container. Cover tightly and refrigerate. This ricotta will keep for up to one week.
Note: To make softer, richer and creamier ricotta to use for desserts, add 2-4 cups heavy whipping cream to your milk and buttermilk at the very beginning of the procedure.
Beet Pesto
Grace Pilato
Preparation time: 20 minutes
Bake time: 25-35 mnutes
Yields: 3 cups plus
1/3-1/2 cup walnuts or almonds
4 medium fresh beets – peeled
1 medium red onion – peeled
1 ½-2 cups extra virgin olive oil (divided)
Salt and fresh ground black pepper
3 cloves garlic – peeled
1 cup packed basil leaves (no stems)
¼ cup fresh ricotta
½ teaspoon salt
¼ teaspoon fresh ground black pepper
1/3 cup freshly grated Romano or Parmesan cheese
Preheat oven to 350°F
Spread nuts in a single layer on a cookie sheet. Toast in a preheated 350°F oven. Walnuts take eight to ten minutes. Almonds take ten to twelve minutes. Stir frequently. Remove and cool.
Adjust oven temperature to 435°F.
Trim, wash, peel and chop beets.
Toss beets and onion in two tablespoons of extra virgin olive oil and sprinkle with salt and pepper. Bake until fork tender, about twenty to thirty minutes depending on the size of the chop.
Remove from the oven and cool. Alternatively you may steam the beets and onions until fork tender. Drain and cool.
In a food processor, mince the garlic. Add half of the extra virgin olive oil along with the basil leaves and ricotta, and puree. Taste for seasoning and adjust with salt and pepper accordingly. Remove and place in a medium bowl.
Don’t wash the food processor bowl. Add the beets to the bowl along with the remainder of the extra virgin olive oil and puree. Add the grated cheese and nuts and pulse a few times to blend.
Combine the beet puree along with the basil mixture in the bowl until all are incorporated. Taste for seasoning and adjust accordingly.
Place in containers with tight fitting lids. Use containers that are the appropriate size for your family needs. This pesto will keep in the refrigerator for up to two weeks, or you may wish to freeze it for up to one year.
![]() Author: Cara McShane
Author: Cara McShane
Bio: Penn State Journalism Student | Foodie & Health Enthusiast | Lover of Cooking, Music, and the Outdoors (especially when combined!)


- Our Local Food Journey comes to an end
- Winter isn’t a quiet time at the farm
- Get the taste of garden season right now by growing herbs indoors
- All you need to know about PASA’s Farming for the Future conference
- January is National Soup Month, so celebrate with some Local Food Journey soup recipes
- Recipe: Roasted Parsnips with Thyme
- Sure celeriac’s ugly…but it’s also delicious
- (See All Recipes)

NO COMMENTS